
Your existing shower head gets the job done – but just barely. A handheld shower head, on the other hand, gives you the flexibility to direct water exactly where you need it, whether that’s rinsing off a squirmy pet, cleaning the tub itself, or simply enjoying a more comfortable shower experience.
The best part? You don’t need to call a plumber or rip apart your bathroom to make it happen. Switching to a handheld shower head typically takes under 20 minutes and costs around $45. That’s it.
So if you’ve been wondering how to change a shower head to handheld, you’ve come to the right place. We’ll walk you through everything – from picking up the right tools to attaching a diverter valve and getting your new handheld system installed and leak-free. Whether you’re working around a low flow shower head or a standard fixed head, the process is simpler than you’d think.
What You Need to Get Started
Good news – you won’t need a toolbox full of specialty equipment to pull this off. Most handheld shower head installations can be handled with a handful of basic tools you probably already have at home. That said, gathering everything before you start will save you the frustration of stopping mid-installation to run to the hardware store.
Required Tools
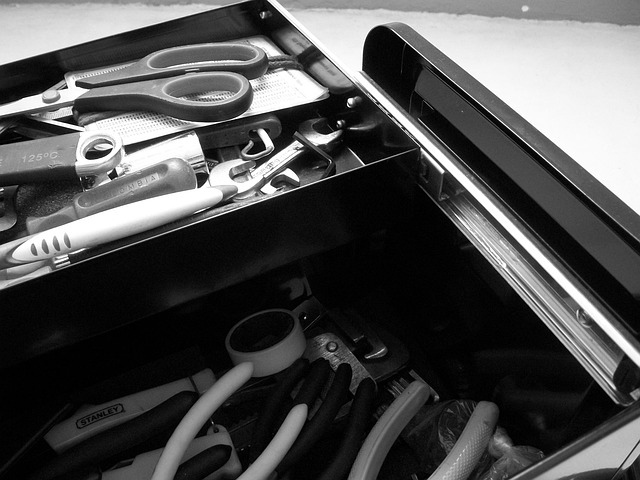
Here’s what you’ll need:
- Adjustable wrench: Grips and turns connections securely without scratching the finish
- Plumber’s tape (Teflon tape): Creates a watertight seal between threaded connections – don’t skip this
- Clean rag or cloth: Protects the shower arm and fixture finish from wrench teeth
- Screwdriver: Needed if you’re mounting a bracket or slide bar
- Pliers or channel lock pliers: A solid backup for stubborn connections that won’t budge by hand
- Drill (optional): Only necessary if you’re adding a new wall-mounted bracket or slide bar
Most shower head connections follow standard sizing, so compatibility usually isn’t an issue. Still, it’s worth checking the manufacturer’s recommendations just to be sure – especially if your plumbing is on the older side.
Materials and Parts
A complete handheld shower head kit will typically come with the handheld unit itself, a flexible hose, and a mounting bracket. The piece you really want to pay attention to, though, is the diverter valve – sometimes called a T-valve. This is what allows you to switch between your fixed shower head and the handheld option. Some kits include it, others don’t, so check before you buy.
You’ll also want fresh Teflon tape on hand, which most kits include. If your kit comes with rubber washers, those can actually replace the need for tape at certain connection points altogether. And if you’re converting from a fixed stainless steel shower head or similar model, double-check that your chosen handheld kit includes any adapter pieces you might need.
A Few Safety Precautions
Before you get started, locate your main water valve or shower-specific shut-off valve. You may not need to shut the water off completely unless you notice existing leaks or plumbing issues – but knowing where it is will save you from an unexpected soaking.
A few other things worth keeping in mind:
- Always wrap your rag around the fixture before applying the wrench. It takes two seconds and keeps the finish looking clean.
- Apply steady, firm pressure when loosening components. Forcing it too aggressively can damage the shower arm threads.
- Use the right-sized tools. Ones that are too large or too small can strip nuts and damage connections faster than you’d expect.
- Take a quick look at the shower arm before you start. Any visible cracks or cross-threading should be addressed now – not after you’ve already installed the new head.
Trust us on that last one. Catching a problem early is a whole lot easier than dealing with a leak after everything is tightened up.
Preparing Your Shower for the Change
Before you can install anything new, the old shower head has to come off – and the shower arm threads need to be clean and ready. Get this part right, and the rest of the installation goes smoothly. Skip it, and you’re looking at annoying leaks down the road.
Removing Your Old Shower Head
Good news: most shower heads unscrew by hand. Grip the head firmly and rotate it counterclockwise. That’s often all it takes.
If it won’t budge, reach for your slip-joint pliers or adjustable wrench. Before you do, though, wrap a cloth or towel around the shower arm to protect the finish. You’ll want to use two tools at once here – one holding the shower arm steady, the other turning the shower head connection. Trust us, this dual-wrench approach is worth the extra effort. Without it, you risk twisting the pipe behind the wall, and that’s an expensive fix.
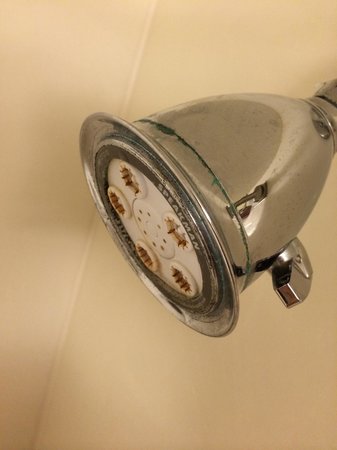
It’s not uncommon to run into some real resistance, especially with older fixtures. Mineral deposits have a way of locking things in place over time. If that’s the case, apply a rust, calcium, and lime remover directly to the connection point, let it sit according to the product instructions, then use a wire brush to scrub away the loosened buildup.
For extremely stuck fixtures, a penetrating lubricant like WD-40 does the trick. Apply one coat, wait two hours, apply a second coat, wait another two hours, then try again. Alternatively, wrap a plastic bag filled with white vinegar around the connection – the acidity breaks down rust and mineral buildup after a few hours of soaking.
Cleaning the Shower Arm Threads
With the old shower head off, don’t rush straight to installing the new one. The shower arm threads need a proper cleaning first.
Peel away the old plumber’s tape by hand. Any stubborn remnants? A wire brush or steel wool will clear those out. If you spot rust or mineral deposits, hit them with rust, calcium, and lime remover, let it sit, then scrub with a wire brush. Finish up by wiping everything clean with a rag.
This step is one people tend to skip – and it’s exactly why so many DIY shower head installations end up leaking. A clean surface is what allows the new tape and fittings to form a proper, watertight seal. Take the extra two minutes. You’ll be glad you did.
Installing Your New Handheld Shower Head
The prep work is done – clean threads, old fixture out of the way. Now comes the part you’ve been waiting for. Follow these steps in order and you’ll have your new handheld system up and running without a single leak.
Step 1: Apply Teflon Tape to the Threads
Wrap the tape clockwise around the shower arm threads – the same direction the components will screw on. This is important. Wrapping the wrong way causes the tape to bunch and unravel during installation. Start at the bottom of the threads and work your way up, giving it 4 to 5 full turns around the pipe. Overlap each layer halfway as you go for complete coverage. Pull the tape taut as you wrap, then smooth it down firmly with your fingers to get rid of any loose edges.
Step 2: Attach the Diverter Valve
Before you attach anything, check that the rubber washer is sitting properly inside the diverter valve threads. Hand-tighten the diverter onto the shower arm in a clockwise motion first, then use your adjustable wrench to give it one additional snug turn. Wrap a cloth around the fitting before applying the wrench – your fixture finish will thank you.
Step 3: Install the Fixed Shower Head
Running a combination system? Screw the fixed shower head onto the top outlet of the diverter valve. Hand-tighten it first, then apply light wrench pressure only if needed. This is what creates the dual-head setup that lets you switch between fixed and handheld at will.
Step 4: Connect the Handheld Hose
Take a close look at your hose – the two ends are different. The hex nut side connects to the shower holder or diverter, while the smooth conical nut attaches to the handheld unit itself. Drop rubber washers into both ends before making any connections. Hand-tighten the hex nut onto the holder threads, then give it a gentle turn with the wrench – but don’t overdo it.
Step 5: Attach the Handheld Head
Place the remaining rubber washer inside the conical nut threads and hand-tighten the hose onto the handheld shower head. That’s all it takes here. Excessive force can crack the fittings, so firm hand pressure is plenty.
Step 6: Mount the Holder Bracket
Dock the handheld unit into the wall-mounted holder. It should sit securely enough to stay in place on its own while still being easy to grab when you need it. If it feels loose, double-check that the bracket is properly fastened to the wall before moving on.
Testing and Troubleshooting Common Issues
Almost there. Turn the water back on and let the shower run for a few minutes – then inspect every connection point carefully before calling it a day.
Checking for Leaks
Keep an eye on the swivel joint, shower arm threads, hose connections, and shower head holder joints. A few drops falling right after you shut the water off? That’s just normal drainage – nothing to worry about. But if you’re seeing persistent dripping or water seeping from places it shouldn’t be, that’s a real problem that needs your attention.
Don’t ignore it and hope it goes away. It won’t.
Fixing Drips at Connection Points
Most active leaks come down to one simple culprit: a loose connection. Wrap a soft cloth around the fitting and turn it clockwise to tighten things up. If the dripping continues, remove the component and take a look at the rubber washer or O-ring inside. Cracks, stiffness, or flattening are all signs these parts need replacing.
For leaks that keep coming back at threaded connections, remove the fixture completely, strip off the old tape from the shower arm threads, and start fresh. Wrap new Teflon tape clockwise around the threads 2-3 times, reinstall, and hand tighten. Nine times out of ten, this does the trick.
Adjusting Water Pressure and Flow
Getting a weaker flow than expected? Mineral buildup inside your plumbing lines could be narrowing the pipes – this is especially common in hard water areas. On the flip side, pressure running above 60 PSI puts unnecessary stress on your pipes and fixtures.
Some handheld models let you adjust the flow directly through built-in settings. Others may require a look at your home’s water pressure regulator near the main line. Either way, a few quick checks will get your new setup performing exactly as it should.
Final Thoughts on Changing a Shower Head to Handheld
There you have it – everything you need to know about how to change a shower head to handheld. No plumber required, no major plumbing work, and no reason to put it off any longer.
With the right tools, a little Teflon tape, and about 20 minutes of your time, you’ll have a fully functioning handheld system that makes every shower more flexible, more comfortable, and a whole lot more practical.
The hardest part, honestly, is just picking the right shower head. That decision makes all the difference. A quality handheld unit from High Sierra is the perfect place to start – built right here in the USA, backed by a 2-year warranty, and designed to install quickly without any headaches.
Shop our full selection today and enjoy the upgrade your shower has been waiting for.